
When it comes time to close the deal on a buck or doe, deer hunters know everything has to fall into place to make the best bow shot possible.
The anatomy of every successful bow shot hinges on many synchronous yet dynamic elements. This lends bowhunting the drama that keeps us coming back, but we also have an ethical obligation to eliminate uncertainty from the equation whenever possible.
Many view successful shooting as a purely-physical function of aligning sights to send arrows through vitals, but scratching beyond the obvious there’s more to this than the act itself. Certainly shooting well is vitally important, the reason we spend off-seasons standing before practice targets honing our skills. The prepared archer often finds important shots come off nearly automatically, actions guided by conditioned subconscious.
Yet, if this were entirely true tyros possessing average target- shooting skills would never bungle an opportunity or blow easy shots. Part of what separates successful from unsuccessful bowhunters is a deeper understanding of how proper stand placement creates high-odds shots, better insight into personal limitations, and finally, how experience prepares them for the many variables ultimately defining “The Moment of Truth.”
H — How High?
How high should I hang my stands? This is one of the most common questions in bowhunting. Elevated hunting’s No. 1 selling point is literally rising above the astute noses of the game we pursue.
 In bowhunting there’s another majorly-important consideration: Undetected shot execution during the conspicuous draw cycle. Tugging a bowstring to anchor isn’t exactly inconspicuous, especially when pulling too much draw weight.
Returning to the original question of stand height, there’s no single answer, no mathematical formula to offer, as there are too many variables in topography, shooting abilities and animal disposition. For instance, one of my favorite setups is a stand high in a downhill tree allowing me to shoot into a hillside hold- ing a trail or ridge point deer frequent, wind blowing into empty space behind my position. In these cases my stand may be 50 feet above the ground, but resulting shots only slightly downhill at 20 to 30 yards. I also recall a Kansas stand from which I tagged one of my best bucks to date, a perch situated only eight feet off the ground but affording wrap-around concealment.
In general terms, besides obvious scent control I find cover more important than overall stand height. In regards to scent, I strive for sites backed by water, falling terrain or obstacles otherwise discouraging deer from traveling directly downwind. In terms of concealment I either cut into thickly-branched trees to create dark “caves” or carefully choose sites backed by background clutter allowing my camouflage clothing to do its work effectively. The less breakup vegetation available, the higher a stand must be placed to assure reliable concealment. Winter-bare cottonwoods, for instance, require higher perches than thick cedars, firs or early-season hardwoods.
Understand, though, in bowhunting climbing too high can actually create shot angles that are too steep, increasing the likelihood of non-fatal one-lung hits, or worse, shots straight into the back. There’s a balance, weighing stand height against shot distance. If proven travel-ways are situated too closely to a high stand, locate a tree set a bit farther back — resulting in 30- instead of 15-yard shots for instance — assuring lethal double-lung hits on passing deer.
SEE ALSO: Dreaming of Bowhunting Wyoming Whitetails
D2 — Distance, Distance
In bowhunting, of course, range is everything. This is a matter of applied maximum effective range, but also sheer confidence in relation to conditions encountered in real-world hunting at the moment of the shot. You may center a 3-D target’s 8-ring every shot at 60 yards during summertime back- yard practice, but presented with live deer at 40 you find confidence flags.

This is natural. Shooting confidently while standing flatfooted in comfortable T-shirt and shorts isn’t to be confused with shooting from cramped stands after sitting in ear-nipping cold for hours. There’s also range in relation to how deer will likely react to a shot. Even quiet bows create alarming thumps in respect to dead-still days when squirrels rooting acorns at 100 yards sound like a parade of deer. I’ve always said intimacy breeds immediacy, meaning shots can prove too close to draw and shoot undetected.
Addressing the matter of maximum effective range — this always boils down to a matter of abilities verses confidence. There are those days and circumstances when a deer pauses at 45 yards and you just know you can make the shot. Other days 25 yards causes qualms. I’ve long lived by the maximum that if the shot feels good, take it. If you’re experiencing misgivings, if the little voice in your head (a.k.a. conscious) issues warning signals, you’re likely best passing the shot.
Establishing a realistic maximum effective range starts on the shooting range; typically based on a yardage at which you can maintain five-of-five arrow groups inside a standard 8-inch paper plate (approximately correlating to an average deer’s vital area) 100 percent of the time. I say 100 percent, because if you start dropping only one arrow per five-shot round during backyard practice, rest assured cold-stiff muscles will transform one dropped arrow into two or three and you owe deer more than 50 percent efficiency.
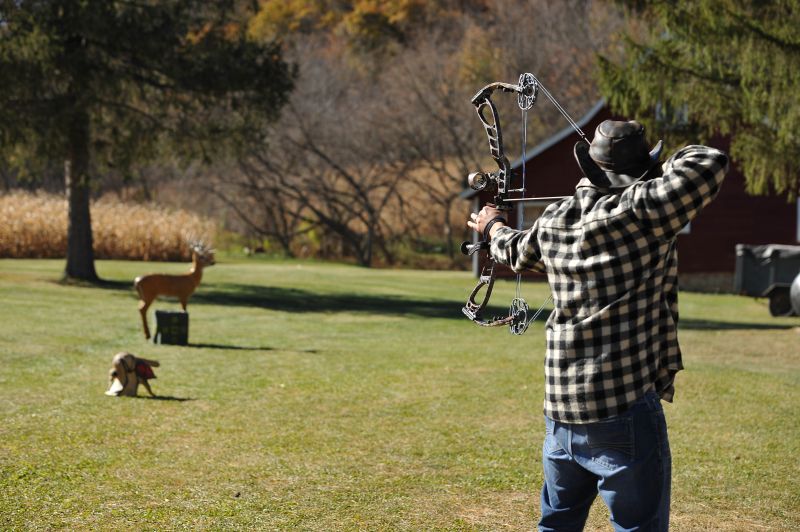
Another aspect of quality pre-season practice is investing in realistic dress rehearsals, actually shooting from an elevated stand set up in your backyard or nearby farm, wearing the heavy-insulated duds, safety harness and facemask you’ll don while actually bowhunting. You may discover your string contacts clothing after release, requiring a compressing arm guard, your safety system restricts drawing your bow from certain positions, your facemask hampers proper anchoring, or that you’re having a difficult time shooting while seated (standing before shooting is out of the question on my backyard deer).
SEE ALSO: Best Shot Placement on Deer for Bowhunting
Preferred range can also hinge on how relaxed or wound up deer are in your area. In some areas a deer at 15 yards would be a tough assignment, hunting pressure or predators causing deer to jump out of their skins follow- ing the faintest rustle of clothing while drawing, or spinning wildly to a thump- ing bowstring. Sometimes it’s actually better to shoot deer at 25 or 30 yards than 15 or 20, distance giving deer an insulating buffer, eliminating dramatic reactions to the shot cycle or shot itself. This all comes through experience with deer in your unique hunting area.
Vn – Various Vexing Variables
Prevailing conditions and/or local circumstances also help you anticipate variables that can affect the probability of executing a killing shot. This all becomes a matter of what-ifs and buts. Maximum effective range is affected considerably by such environmental factors such as poor light and wind, uncomfortable shooting positions, and by the disposition of the deer.
The common theme of shooting at the edge of legal shooting hours, especially under a heavily overcast sky or beneath deep forest canopy, automatically shaves yardage from your maximum effective range. It’s simply more difficult to pick a finite aiming point under such conditions, as well as complicating mechanical factors such as precise peep and bow-sight alignment.
 While shooting in wind you’re sometimes dealing with two factors; direct arrow drift, but also a swaying stand tree. The biggest buck I’ve arrowed, a 160-plus Iowa behemoth, was shot in a raging storm, my tree like the mast of an ocean-tossed ship. I followed that buck an excruciating amount of time at full draw, until the tree stabilized momentarily, allowing me to dump the string at the last possible moment.
Arrow drift may seem a non-factor at whitetail range, but don’t be fooled. Depending on wind velocity and angle, range, arrow speed and arrow/fletching surface area, wind drift of up to 6 to 8 inches (or the width of a deer’s vital area) is feasible beyond 30 yards – more when shooting a slower traditional bow and arrows with larger feathers.
Low-diameter carbons such as Easton’s Injexion and Axis, Victory’s VAP or Quest Archery’s tapered Power Punch, just as examples, compact vanes such as Bohning’s Blazer or Norway’s Zeon, plus streamlined mechanical broadheads, are a boon for minimizing drift in these demanding situations.
Swaying trees are more problematic. There’s also the factor of deer showing up from the worst possible directions, prompting shooting positions that are less than ideal — twisted, squatted, seated (for many, I prefer sitting while shooting from stands), leaning and so forth. It’s important in such circumstances to consult your sight’s bubble level during the shot, assuring your bow remains plumb to avoid left-right impact deviations, and to maintain a strict shooting-form regimen. This means maintaining solid T-form between torso and shoulders, bending only at the hips to address targets appropriately. Again, these are all aspects you should sort out during off-season dress rehearsals.
Shot success also depends on accurately reading the body language of each animal addressed. This is part understanding the general disposition of deer in your area – innately relaxed or on edge – part seeking signs telling you if each deer makes a viable candidate for an archery shot. Deer in areas with innately-benign turkey or livestock, for instance, often tolerate some small amount of activity in their vicinity, while those in areas teaming with wolves, cougars or coyotes — or intense hunting pressure — might prove understandably intolerant of the smallest mistakes.
This is important information when contemplating shot timing, making a decision as simple as deciding to stand to shoot or remain seated. Deer displaying irritably-swiveling ears, swishing tails or bobbing heads tell you to proceed cautiously, waiting for deer to settle before attempting to draw, or if already anchored, that a string jump is more likely than not. Deer eyeing you or stomping hooves will almost certainly result in a jumped string and potentially misplaced shot. Calm deer, those who have no idea you exist, always make the highest-odds targets.
The formula for successful bow shooting isn’t rocket science, but does require studied approaches to setup and how you proceed after deer appear in range. Such developments can occur in just a finger snap, or allow you minutes to gather your wits.
Three Best Bow-Silencing Products
Modern compounds are increasingly silent out of the box, via string suppressors, special limb pockets and parallel- limb technology, but this doesn’t mean you can’t make them quieter yet.
Regarding string silencers old-fashioned Cat Whiskers still get my vote. Rancho Safari makes the original and still unequivocally the best, heavier “whiskers” lasting longer and silencing better. Owner Jerry Gentellalli recommends attaching them with an over- hand knot; instead of serving them into place or threading through string splits.
Sims Vibration Laboratory deserves much of the credit for launching bowhunting’s silencing revolution. Their original LimbSavers limb dampeners, now in their third generation, are still one of the best bow-silencing products around, made for solid and split- limb bow designs.
A quality “active” stabilizer makes any bow quieter (and more accurate), actively absorbing bow vibrations that create excess shot noise. There are many options today, but Doinker’s rubber-coupled designs are still No. 1 in stabilizers for me.
Too Much Draw Weight?
It’s easy to spot archers pulling excessive draw weight — pointing bows skyward or sweeping the points of the compass while fighting to anchor. This works for 3-D targets but translates into attention-grabbing movement and lost shooting opportunities while in a tree-stand. Add cold, stiff muscles after several freezing hours on stand and it can also lead to injury.
If you can’t point your bow directly at the target and pull it straight back slowly and smoothly, you’re shooting too much weight. Any deviation in draw form means you’re over-bowed and should back off on draw weight. Try this: Sit on the floor with legs forward and slightly spread. Hold your bow level, between your legs, and pull it straight back. If you struggle to reach full draw, reduce bow weight.
You don’t need to wield he-man bow weight today to enjoy flat trajectory and killing energy. A comfortable draw weight of 50 to 60 pounds is plenty to cleanly kill any whitetail.
— Patrick Meitin is a longtime D&DH contributor from Idaho.
+++++
A Must-Have Hunting Accessory for Every Pack
Get a hand warmer, LED flashlight, and portable power supply all in one device with FireCel – a versatile and compact multi-purpose tool! Built with a high-quality aluminum shell, this device is durable enough for outdoor use, as well as compact enough to easily fit in your hunting bag, pocket, or glove compartment.
FireCel features a two-temperature hand warmer, with both 110- and 130-degree settings, which will provide steady heat for up to 3 hours. Charge your smartphone, MP3 player, or other USB-powered device with the included 2500 mAh rechargeable lithium ion battery – it can deliver a full charge. Plus, the integrated LED flashlight includes both red and white LEDs, as well as 5 operating modes: red light only, white light only, red light blinking, white light blinking, SOS. See it here now …