There are so many different reasons why we enjoy hunting: the solitude of sitting in a ground blind or treestand; the thrill at seeing a trophy buck appear in front of you lined up for a clean broadside shot; the close proximity to other types of wildlife. But one thing we all have in common is the desire to stock our freezers with venison, one of the few truly organic and free-range meats still available. Hunters appreciate the authentic field to table experience, and those who take the time to learn how to process their deer have the ability to control the meat quality from harvest to freezer.
By Kristen Schmitt
Deer processing can be intimidating, especially if you are doing it for the first time. While books and other resources are plentiful, watching a friend with experience process a deer in order to learn the process can be incredibly helpful.
“All mammals are generally built on the same chassis with little differences,” said Hank Shaw, a James Beard Award winning food blogger and author of several wild game cookbooks.
Mike Caspar, CEO of Weston Products, a company that manufactures game processing equipment, agrees. “If you can cut up a rabbit, you can cut up a deer,” he said. “Don’t butcher a whole deer your first time through. Take it to a processor, have them handle all the steaks and roasts and set aside the scraps to grind yourself. Just focus on the sausage and jerky and other recipes. The next time you can get a little braver. Have the processor keep all of the main muscle groups whole, then cut the steaks and roasts yourself. Once you start to get comfortable with that, then you can try and do a whole deer on your own.”
Easing into the process is one way to make it less daunting. Here are five other ways that make processing your deer easier:
Do Your Homework Long Before Deer Season Begins
If you plan to process your own deer then you need to have a basic understanding of butchering techniques and where the different cuts of meat are located. Remember when you took hunter safety class and learned the different deer positions for making a clean kill? Understanding where to make your first cut after skinning the animal is just as important.
Deer & Deer Hunting has articles on its website that provide this information as well as great cookbooks and digital downloads such as, “Gut It: The Deer Hunter’s Guide to Processing and Preparing Venison – Part I,” by Al Cambronne and Eric Fromm. This guide provides extensive knowledge of the whitetail anatomy and will help you understand where to begin to process the deer into venison.
Obtain Your Processing Equipment Before You Head Into the Woods
Don’t use old knives or dirty power saws to process your deer. If you took the time to scout and harvest your whitetail, investing in a few necessities to process it yourself is the key to high-quality meat.
Make sure you have a clean prep area with good lighting. You can’t butcher a deer in the dark.
Invest in (or borrow) the minimum amount of equipment needed to process your deer into venison. Being prepared can help alleviate any intimidation you might have. Basic equipment includes a sharp knife, a meat saw, food grade plastic tubs (also called lugs) and an ice cooler to store the meat as you work. You’ll also want butcher paper, shrink-wrap, resealable bags or a vacuum sealer to wrap your cuts. Using a vacuum sealer such as Weston’s Vacuum Sealer Pro 1100 ensures the meat you’ve processed stays fresh and can be stored safely in the freezer for up to two years.
Companies such as Outdoor Edge offer complete game processing kits in a range of prices that come with specific knives, saws and accessories to process your deer. Using different knives for different parts of the process can help keep contamination of the meat with blood and hair to a minimum.
“I basically do all of my butchering with two knives and a saw,” Shaw said. “I always take shanks off whole. It should be a whole piece of meat that you celebrate. It also makes it a lot easier because you’re just cutting off the shanks.”
Meat saws allow you to cut cleanly through bone and gristle. Adding a commercial grade meat grinder allows you to process scraps from cutting steaks, roasts, etc., into hamburger. Beyond the basics, there are countless additions to your deer processing equipment such as jerky dehydrators, meat smokers and sausage making kits.
Field Dress as Soon as Possible
Field dressing the deer allows the body to cool quickly so the meat will not spoil. If you live in a cool climate, hanging the deer overnight is fine. But if you live in a warm climate, make sure you have ice to pack around the animal to keep the meat cool. A basic field dressing kit includes a sharp knife, latex gloves (preferably shoulder-length) and some rope.
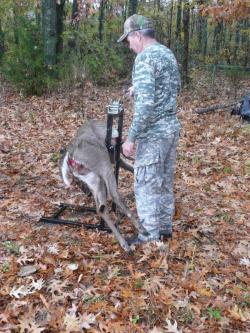
While we continue to see an increase in hunting among youths and women, the reality is the average age of a longtime hunter is increasing.
“We looked at the current hunting community and, unfortunately, our general hunting population is much older now and we found out that a lot of hunters were not shooting deer because they were concerned about getting hurt when having to move the deer out of the field or hoisting it for field dressing,” said John Woller, Jr., president of Viking Solutions.
Viking Solutions decided to address these concerns by offering options such the L-E-Vator, a portable lifting system that makes it easier to get a deer into your truck or ATV, and the Kwik Hoist, which can attach quickly to a tree or barn pole to make field dressing easier.
“Our products are also beneficial to any veterans or wounded warriors who want to get out there and hunt,” Woller said.
When field dressing, cracking the sternum of the deer makes it easier to empty the upper chest cavity, but depending on the age of the deer can sometimes be difficult. Viking Solutions’ Deer Splitter provides enough leverage to split the cavity cleanly and is small enough to easily add to your hunting pack.
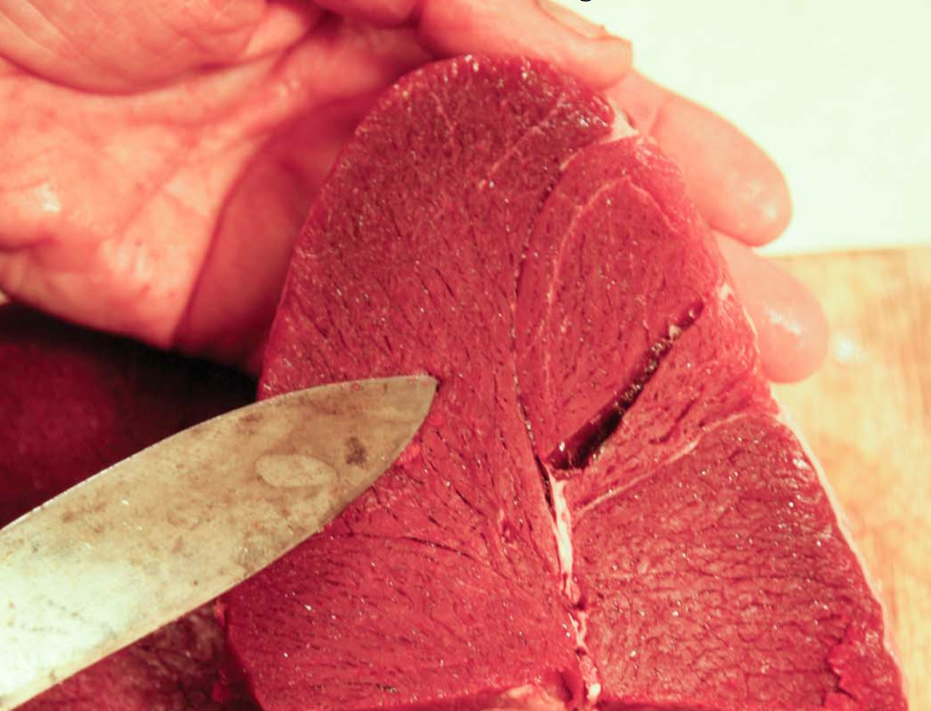
Trim, Trim and Trim
Remember that while beef fat might taste good, deer fat does not. Venison is not beef and that means that anything left on the meat takes away from the quality of the taste. Much of the gamey flavor that people complain about comes from poorly trimmed meat that has silverskin and other tissues still attached.
It is important to take the time to trim off the fat, sinew, membranes and other tissues connecting the muscle to the bone. You can use a sharp knife to trim after deboning all the meat, separating it into the various muscle groups.
Shaw offers a helpful tip: “It is a lot easier to remove silverskin on thawed meat than on fresh meat. I get 90 percent of the stuff off and leave the fine work to just before I cook it.”
Freezing and Storage
If you don’t own a chest freezer, buy one. You’re going to have between 40 and 60 pounds of venison per deer when you’re done, and a chest freezer allows for plenty of storage space and a consistent temperature that you might not get with your kitchen refrigerator/freezer combo.
After you have butchered the deer, leave the meat on ice or place it in the refrigerator for a few days before freezing it. This allows for the meat to relax further and results in more tender venison. Shaw cautions, “If you are using a cooler filled with ice, don’t let the meat touch the ice because you don’t want it to get soggy and wet.”
Vacuum sealers are what many use to preserve venison and other game meats. They are easy to use and allow for the meat to be stored in the freezer for up to two years. They come in a variety of prices. Weston Products has a variety of vacuum sealers including a portable vacuum sealer if you are planning on hunting away from home and want to process the deer once you kill it.
Preparation and time are the key elements in processing a deer successfully. A lot of the intimidation can be eased by understanding what exactly needs to be done and taking the process slowly. The hunting community is one of camaraderie and support. Remember to ask questions of those who have experience processing their own deer or look to many different online resources, such as Shaw’s Honest-Food.net blog or the supportive social network of hunters and wild food enthusiasts online. With all the information and equipment available, why not give processing your own deer a try?
+++++
Here’s a great recipe from Stacy Harris, author of “Happy Healthy Family” and a fantastic wild game cook! She’s one of our favorites, no doubt, and this sounds like an incredible dish that could be served at a fancy dinner or for a family meal! Be sure to visit her site, too: gameandgarden.com
Venison Sausage Smothered in Italian Tomatoes and Onions Over Cheesy Grits
Serves 8
Deer season is approaching fast! Time to clean out the freezer! Do you have a favorite sausage recipe?
Hint: You can use any cut of the deer for this recipe
4 pounds venison scraps, run through the largest holes of grinder.
2 pounds of lean bacon (no nitrates), run through the same grinder.
1-tablespoon kosher salt
½ tablespoon pepper
½ tablespoon red pepper flakes
1-tablespoon rosemary, minced
½ cup Italian parsley
½ cup dry white wine
8 ounces sausage casings (about 8 feet)Directions
1. In a large bowl, mix the venison and bacon with your hands until well blended. Add the rest of the ingredients and mix just until blended. Chill mixture for 30 minutes.
2. Set up a sausage stuffer and attach the casing to the funnel feeder. Begin stuffing the sausage into the casing and twist every 4 inches. Keep the diameter about 1 inch to insure proper cooking. Prick sausage with a pin all over. Chill until ready to cook.For Tomato and Onion Sauce
3 tablespoons extra virgin olive oil
1 medium yellow onion, ½ inch diced
2 cloves garlic, minced
2 tablespoons tomato paste
½ cup chicken stock
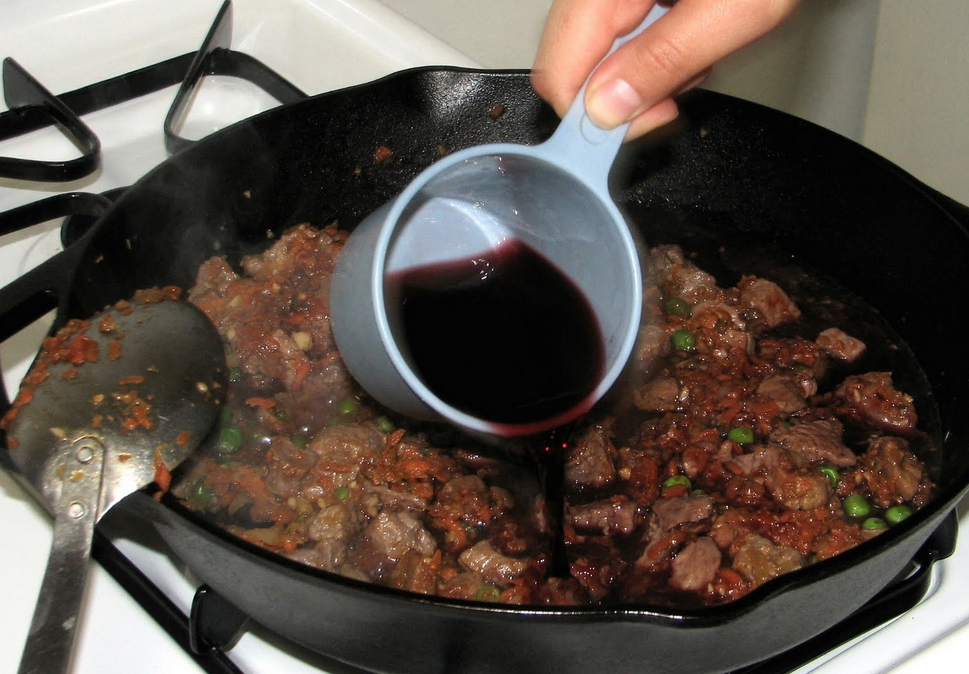
1 cup red wine
¼ cup Italian parsley
Directions
1. Heat 2 tablespoons of olive oil in 10 to 12 inch sauté pan. Add half the sausage links to the pan. Cook over low heat, turning frequently, until browned on all sides. Transfer to a plate. Brown remaining sausage links and transfer to plate.
2. Pour 1 tablespoon olive oil in the same pan sausage was cooked. Add onions and garlic to the pan and cook until soft, 8 to 10 minutes.
3. In a small bowl mix tomato paste, stock, and red wine and mix well. Add mixture to the pan. Scrape brown bits from the bottom of the pan and bring to a simmer.
4. Return sausage to the pan, cover, and cook for 15 minutes or until cooked through. Stir in parsley and serve over Cheesy Grits.
Cheesy Grits
Ingredients:
5 cups water or chicken stock
1 cup grits
3 tablespoons butter
½ teaspoon salt
½ teaspoon pepper
½ cup Parmesan-Reggiano
1. Add grits, butter, salt, and pepper to the water or stock. Bring to a boil stirring constantly, and then reduce to simmer for about 30 minutes, stirring occasionally.
2. Just before serving, add the Parmesan and stir until dissolved.
+++++

Do You Love Slow-Cooked Venison? If so, you don’t want to miss out on fantastic meals by using all of your deer meat. Don’t toss the shoulders and necks! Check out how you can convert those into super meals your family will love with Scott Leysath’s Better Venison Cookbook. Click for more information.