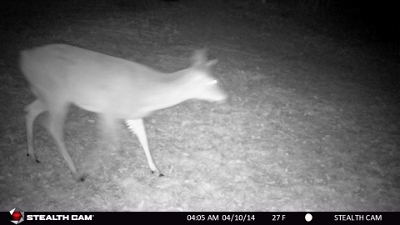
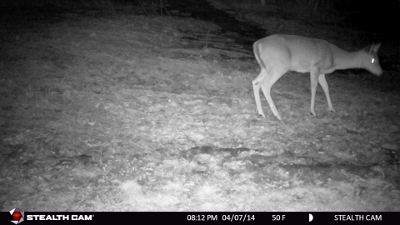
Growing up in the suburbs, I will admit that I led a trail camera free life, unaware of this fun way of monitoring what’s going on around your property when everyone’s asleep. In fact, had I even known about trail cameras back then, I’m not sure what use they would have been in my suburban neighborhood, unless I wanted to catch images of the stray night jogger or a raccoon in my trash.
In all of my hunting and archery research, I’ve learned that gear is an incredibly important part of the process and trail cameras are an incredibly interesting tool to use on your property for so many different things. I have a friend who set up a trail camera in the barn to figure out what was killing his chickens (raccoons), another who uses it as an extra security camera when they are out of town, and another to see what’s going on with the local nightlife without any interest in hunting. So I was incredibly excited to set up a trail camera on our property to see what I might be able to capture.
I had the chance to try out the 2014 Stealth Cam G42NG. But first, I wanted some tips because a) I’ve never set up a trail camera before and b) our property has so many different places that seemed like ideal places, but they can’t all be ideal, right? I figured it was worth asking for a few trail camera tips. Here’s what the guys at Stealth Cam told me to do:
Tips for Setting Up Your Trail Camera:
- Try and avoid setting the camera up facing east or west because the rising and setting sun can affect picture quality.
- Select a background of trees between 40 to 60 feet for optimal photo quality.
- Make sure that there is nothing in the foreground that the camera may focus on instead of the subject triggering the camera.
- If the camera is focused on a tree for illumination, it may affect the over/under exposure of the image.
- Setting up on a trail: try to select a spot where the animal will not pass too closely to the camera – at least 20 ft back and angled 45 degrees to the trail in order to see what triggered the camera.
- Use the test mode to verify that where the trail camera is set up is going to pick up the area you are aiming for.
Their tips worked! Here’s my first trail camera photos using the G42NG:


 It may seem like the same doe, but the times are all so different that I’m hoping it’s not. Still looking for that beautiful buck, but this is definitely a start!
Do you have trail camera tips?
+++
Get This Great Cooler/Dry Box and You’ll Be Set!
Whether you’re going to the beach on vacation, relaxing at the fishin’ hole or sweating your butt off in summer at a deer camp work day, this Engel Cooler/Dry Box will be a great benefit.
Three sizes are available and they all come with these great features:
- Quality injection molding and high-grade molded polystyrene foam insulation keeps your food and drinks cold
- Air-tight EVA gasket seals the entire lid
- Carrying is comfortable with recessed ergonomic carry handles and an integrated shoulder strap
- Stays shut with stainless steel latches and fittings secured with stainless steel screws
- No foul smells, thanks to stain and odor resistant surfaces
- Easy to clean with a non-absorbent surface
- Compact and lightweight
- Self-stopping hinge
- Includes a convenient hanging accessory tray


i find it works best if you hang it a bit higher than recommended i am 6′ 2” and i hang it belly button high which is about 6-10” above recommended height which gets me less pictures of wind
Thank you for the tip!