I remember my first batch of venison summer sausage. This was back in the “olden days” of the early 1980s, when I was fresh out of college and poorer than when I was in it. But true to form for a young hunter with boundless energy, I had a good autumn of deer hunting between bow and slug gun seasons, and managed to turn a collection of antlerless tags into a trio of good white-tailed does on the ground — and a nice batch of trim meat even after grinding up enough burger for a year for myself and my new wife, and after making chops, steaks and roasts.
So what to do with all of that extra trim meat? There was no money in the family budget for professional services, let alone sausage-making machines or tools, so I did it all by hand:
— I used my mother’s hand- cranked meat grinder, brought over from Bohemia.
— I mixed ground pork and ground venison by hand.
— I worked spices and curing agents into the mixture with my fingers.
— I stuffed sausage skins and tamped meat down, with a wooden spoon.
— I smoked the creations in an old electric unit; thank goodness the weather was mild so the meat “cooked” enough to be safe.
You know what? That batch of summer sausage turned out great! But it was a whole lot of work. There had to be a better way. And there was, once the family budget afforded a little more breathing room. That better way was building up a set of the right tools for the sausage- making job — to save time and make an even better end product.
The following itemized list will help you prioritize and gather the tools and machines you need to make great venison sausage products (summer sausage, brats, polish or kielbasa, sticks and more) efficiently.

MEAT GRINDER
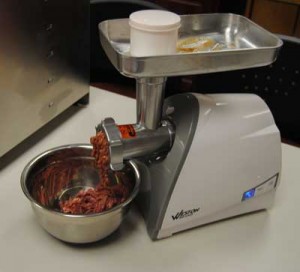
After trimming venison into chunks, the first step in the actual sausage-making process is grind- ing the trimmed meat. There are two options here.
Power Grinder: Electric grinders make short work of grinding jobs. Good examples are grinders in Weston’s Butcher Series and Pro Series. Secure a heavy-duty grinder with at least a 3/4-horsepower motor to get the job done right, and a good-sized hopper to hold plenty of meat. A 1- to 11⁄2-horsepower model is ideal.
Hand Grinder: There’s nothing wrong with hand grinding your meat for sausage. It just takes longer and requires more muscle power — not issues if you have the time and energy, or a team of strong, young crankers! Divide jobs and conquer. One person should feed meat into the hopper steadily while the other person works the crank. Weston offers heavy-duty manual meat grinders in its lineup.
MEAT MIXER
One of the keys to making great sausage is getting a good mix of the ground meats (venison and ground pork, traditionally), seasonings and curing agents. You can do this by hand, but that process can break down the meat more than is desirable. It’s better to use a mixer to get even dispersal of all ingredients in a minimum amount of time. Mixers move you toward the pro level of sausage making, and they save time and work. In addition, a mixer is well worth the investment for the quality it provides to the end product. Who wants an “all venison” brat followed by an “all pork” brat, for instance? Or one with spices and one without?
WATCH: Stacy Lyn Harris of GameandGarden.com Shows How She Makes Venison Sausage
KEEP IT COOL
While you won’t be buying a refrigerator or freezer specifically for sausage making, you should make a few shelves available in the units you already own. Why? Because an essential part of the sausage-making process is keeping the meat cool (between 34F and 38F or so) during the work, for ideal mixing, binding and adhesion. Cool meat is stickier and food-safe. Warm meat isn’t safe later for eating, it gets too soft to work with and doesn’t bind together well.
SAUSAGE STUFFER
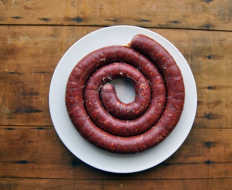
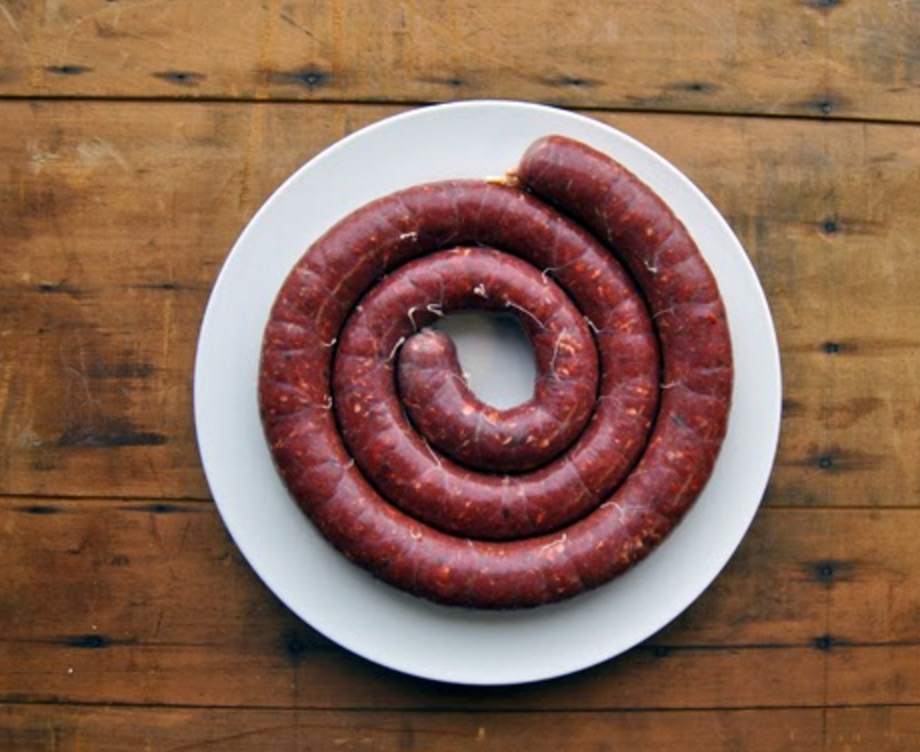
OK, so you ground your venison and mixed it with pork (or perhaps beef fat), spices and curing salts. How the heck do you get that meat mixture into casings? Whether it’s summer sausage, ring bologna, kielbasa or brats, the challenge is the same: extruding the meat mixture into a casing that is then twisted or tied off and ready for smoking, cooking or freezing.
Sausage stuffers can be oriented vertically or horizontally. The basic idea is you load meat into a hopper and push it through to fill up the desired casing before sealing off as described above.
Look for stuffers that come with different size funnels for the different sausages you want to make. As an example, Weston’s Realtree Outfitters 7-pound Vertical Sausage Stuffer is a perfect unit for the deer hunter/ home butcher, and it comes with four funnels: 13mm for snack sticks; 20mm for pepperoni and bratwurst; 30mm for summer sausage; and 40mm for luncheon meats.
SMOKING WITH GAS
You’re not done yet! Well, maybe you are if you want “fresh” sausage (such as brats or breakfast links) that you are going to cook in a pan or on a grill later. You can, however, use a smoker to impart a smoky flavor, but not cook the sausages through. This is called cold smoking.
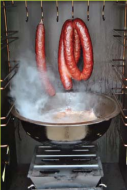
But many sausage products — summer sausage, smoked brats and snack sticks come to mind — are pre-cooked in a process known as hot smoking. This means the meat is heated during smoking to a bacteria-killing temperature of at least 160 F. To get hot smoking accomplished, you need a unit with enough power, insulation and air-tightness to heat up and hold that heat while smoke permeates. Propane is the answer.
Most electric smokers just don’t supply enough heat for hot smoking, though they do cold smoke just fine. But you can cold smoke in a propane unit, too.
HAND TOOLS
In addition to the above appliances, you will need a selection of hand tools to assist in the sausage-making process.
Stainless Steel Bowls and Pans — For holding chunked and ground meat between steps.
Meat Thermometer — For making sure your meat stays cool (well under 40 F) and food-safe as you work.
Meat Pusher — A pestle-like tool for pushing meat into the grinder mechanism.
Pricker — Better than a knife, this tool makes tiny holes in sausage casings that let air escape.
Cleaning Brush Set — For really getting grinders, mixers and stuffers clean.
Scale — For weighing meat portions for recipes.
Measuring Cups and Spoons — For measuring out spices and curing agents.
Wooden Spoons and Scrapers — For transferring meat between containers.
Plastic Gloves — For sanitary working conditions.
Any step of the sausage making process can be done by hand. A better plan is to prioritize your wish list and acquire the necessary tools of the sausage-making trade as your budget allows.
Here’s a great recipe from Weston for Venison Andouille Sausage that is easy to make and will give your dishes some kick.

Venison Andouille Sausage
Andouille is a highly seasoned Cajun sausage perfect for making good use of trim and less tasty cuts. It’s also easier to make than it is to pronounce. Armed with a meat grinder and a smoker, we made ours in less than three hours (which is pretty darn good for a smoked sausage from scratch). This recipe makes 3 pounds.
– Ingredients –
2 ½ lbs venison, cubed
½ lb pork fat, cubed & frozen
5 cloves fresh garlic, minced
2 tablespoons smoked paprika
1 tablespoon cracked black pepper
2 teaspoons ground cumin
2 teaspoons onion powder
2 teaspoons brown sugar
1 teaspoon white pepper
1 teaspoon oregano
1 teaspoon basil
1 teaspoon hot chili powder
1 teaspoon kosher salt
1 teaspoon roasted ground coriander
½ teaspoon crushed red pepper
– Tools –
Weston Meat Grinder
Weston Sausage Stuffer
Casings
Weston Smoker
wood chips for the smoker (we used pecan for this recipe)
Mix all of the seasonings. Use your meat grinder to grind the meat and fat through a coarse plate. Combine the ground meat with the seasonings, then grind it through the medium plate.
Next, use a sausage stuffer or a sausage stuffing attachment for your meat grinder to stuff the casings with the ground sausage mix.*
Preheat your smoker to 250°F. Soak wood chips for 30 minutes. Fill the water bowl & wood chip box of the smoker, then smoke at 250°F for two hours (or until the internal temperature has reached 155°F), under heavy smoke. To achieve heavy smoke, we recommend opening the side dampers ¼ of an inch, and keeping the top damper closed. It’s important that you keep the water bowl full and change the wood chips if they ash.
Use your andouille in gumbo, jambalaya, or let it cool and freeze it in vacuum bags until you’re ready to use it.
*After stuffing and before smoking, it’s not a bad idea to vacuum seal the sausage and refrigerate it overnight to allow the flavors to bloom and marinate throughout the sausage. We were making a quick sausage, and so we went straight to the smoker. Our andouille was awesome, but yours will be even better if you let the sausage marinate.
For more fantastic wild game recipes, preparation tips, awesome kitchen tools and more, visit the Weston blog.

